This is not a craft blog. This is not a craft blog. This is becoming a craft blog. In my defense, I am coming down off of Christmas crafting, and this is a really cool idea I need to share with you. My super awesome idea is a DIY picture puzzle I made for people as presents, and my gift recipients seemed to love them. My sister-in-law is to thank for this idea; I just tweaked it to make it my way.
The picture puzzles are made from 1 1/2″ wooden blocks, and when they are put together display a photo. There are six sides, so you get to choose six photos or pictures or even words for your special someone. Make one for a friend’s birthday or for your lovely Valentine, especially now in the winter months when Ohio is a cold dark bubble. The puzzle is personal, fairly easy to make, and just plain cool.
Here are my easy-to-follow directions, as follows:
GATHER YOUR MATERIALS
- Wooden craft stick from Lowe’s that is 1 1/2″ by 1 1/2″ (ask the wood guy, he can help you). This will give you two puzzles and couple of extra blocks. *If you don’t want to cut the blocks, Michael’s and JoAnne’s sells wooden blocks. Just call to make sure they are in stock
- Table saw to cut the blocks
- Sander to sand the block edges and any parts that are pokey
- Six 5×7 photos (I got extra prints, and it was a good decision because I messed up cutting a few photos. Do one hour developing for clarity, and work on the contrast and brightness of your pictures, if possible. Clarity and contrast can be done when you drop off pictures or at home in photoshop or iPhoto.)
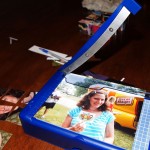
- Card stock paper cutter they use to make cards or in scrapbooking. Or an X-acto knife and soft board surface to cut the pictures up
- Ruler to measure out your picture for cuts if you are using a knife (Unless you can cut a straight line with scissors, which for me is impossible. I say use the knife!)
- Mod Podge
- Spongy paint brushes for applying Mod Podge
- Paper plate and parchment paper (plate for sitting your brush on while you work, and the parchment for putting your blocks on to dry)
SIMPLE INSTRUCTIONS (Even I only messed up twice…)
BLOCKS
- Cut your blocks into 1 1/2″ by 1 1/2″ blocks. You will need 9 of them for each puzzle.
- Sand the blocks to make them smooth.
PICTURES
- Use the blank puzzle blocks put together in puzzle form to create a template on a piece of paper (should be one big square). Use this piece of paper to trace your square over the area of the photo you want to use. Cut the area away on the photo that isn’t being used.
- Cut up the photo a smidge below 1 1/2″ by 1 1/2″ squares (be sure to line up your picture properly, as in, don’t cut down edges in the middle because your picture will look weird. Be sure to cut extra off from around the edges and make it uniform so your picture lines up when you put it on the blocks.).
- Put the picture together like it will look on the block.
 APPLYING THE PICTURE: YOU WILL BE DOING 6 SIDES
- Using your sponge brush, apply some Mod Podge to a blank puzzle block.
- Put a square of your photo on the block, and do this for all subsequent blocks until one of your puzzle faces is complete.
- Let the photo squares dry on the blocks before doing the next step (about 10 minutes).
- Put three coats of Mod Podge on each side of each block. This seals the picture and protects it so it can live a long puzzle life.
- Let the Mod Podge dry between coats.
PRESENTATION
- The puzzle can be stood up so the picture is on display when it isn’t in play mode. Think about seasonal pictures so gift recipients can display the puzzle with a different picture at various times of year. I like to put an embarrassing or silly photo on there as well.
I found another person who created a picture puzzle. Check out how she did it here: What to Expect blog. I love that her idea is for Father’s Day and that she painted a few sides. My dad requested a puzzle with pictures of his antique cars. That will be my next craft endeavor. I may make him a second one of pictures of him with his grandkids.
*Note: The Oscar Meyer Weinermobile visited my house this summer. My friend came over thinking I was serving hot dogs. Little did she know she’d get to sit inside one!*


Thanks for the link to my blog post on What to Expect! Your photo puzzle came out so cute. We’re definitely going to make some more for the grandparents, too. 🙂